Wednesday 26 May 2010

Sweet origami drawings

(Click image to enlarge)

These are a few of my initial ideas surrounding the food idea. It was interesting making the origami out of rice paper as I had to manipulate it very delicately and there was always the fear of tearing it. I would want my origami sweets to go in confectionery stores and to become something of a treat like expensive biscuits or chocolate. As they're made from rice paper like flying saucers, I'd also want them to be available to children so a cheaper form filled with sweets that appeal to them would also have to be readily available. In one of my samples I filled it with strawberry Millions but for them to appeal to adults some kind of dry, more expensive alternative would have to be found.

Tuesday 25 May 2010

LED Origami


Above is one of my origami lights made from two types of tracing paper, one white and one blue, I had initially made the boxes in all the same colour but I found I liked the combination and thought it made the boxes more visually capturing. I chose to use tracing paper instead of normal paper for its translucent qualities, wanting as much light as possible to be able to come through. I had intended on using a different origami pattern but when I came across this one and tested it out I found that more light came through and there is more variety in the density of paper creating different shadows. I like how once lit up the box becomes almost like an x-ray showing the internal structure which would otherwise be hidden. 
I used two different coloured LED lights which gave different lighting effects and were put together in two types of ways. The first was a blue LED from a juggling ball I dismembered, it is already assembled into a working light with a switch, a circuit board and two watch batteries. This is the easiest of the two systems to use as it can easily be fitted inside, however I didn't like how when placed in the two tone cubes it rendered them completely blue nevertheless I found that having atleast two batteries was necessary to making the light bright enough to penetrate the material. The second light I put together from a white LED and watch batteries, all secured with a lot of tape, it was from making my own that I found out the more batteries the better, for some reason though the light still wasn't as clear as the blue LED. It was incredibly easy to make the light and as the bulb uses so little energy and the batteries have so much power, it would last a long time before starting to dim, I would like to learn how to make my own proper working circuit with switch though and it would have made turning the light on and off easier. I would also have liked to have had a sensor in the light which would detect changes in the exterior light and sensed when something was placed over it so after a time it would automatically switch off. It would also have been interesting to place motion sensors inside them so depending on how they were set up they could either dim or brighten the closer someone got to it.
My initial thoughts around the lighting up origami were to have a series of the cubes which could be placed over each other, gradually getting bigger and dimming the light till it was extinguished, like a light up Russian doll. I'd have liked to see how the lights would have looked en-massé, almost like a mini Festival of Lights. They could also have provided an interesting solution to seating and lighting in an outside place such as a park or high street, working in a similar way to light sensitive street lamps so as the night drew in they would light up and could create a path through an outside area. I think there's quite a wide spectrum of applications for this idea, scale could play a large part in it, I had initially envisioned them quite small as personal lights but they could also be used as a way to bring people together or by creating a focal point in an area or by making someone feel safer in an otherwise unlit place.

Origami development drawings

(Click image to enlarge)

These are some drawings of my some quick development ideas I had after experimenting with the different origami boxes. One is of an existing pattern which involves multiple layers, I liked this design and it could have looked really good if made from a mix of materials and textures. The other is a box which gives the user the opportunity to wrap up the contents. I came up with these ideas after speaking to Julia about my project and her suggest to make the boxes customisable.

Origami drawings

(Click image to enlarge)

These are a few of my first drawings after going down the route of origami, these were my favourite ones out of the selection I had. Once I had settled on the origami idea I've really tried to make it my own, I realise that I'm reproducing designs which someone else has come up with, but rarely do they take the basic shapes to the next level, they're simply discarded and were only ever something to pass the time. I think the designs I chose to take to the next level were the most promising and I have been able to develop them through material exploration quite successfully.

Casting drawings

(Click image to enlarge)

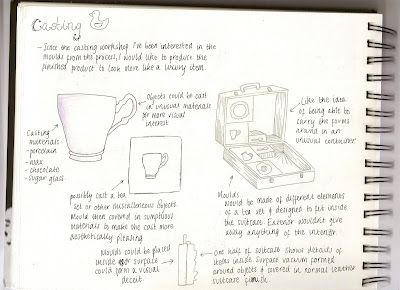
Some initial ideas around the notion of casting and how I could apply it to suitcases. Had intended on gathering together a tea set and an old suitcase and fitting the moulds to the inside of it, however I eventually got bored with the idea and was finding it difficult to develop it into something else when Debbie mentioned packaging and instantly felt inspired again. Also as the project has mostly been about material exploration, I doubt how far I could have gone with this idea, I am far more pleased with the way the origami direction took me, though there are a few ideas I had with the suitcases which I would like to come back to.

Monday 24 May 2010

Electric Origami


I found an article showing how to create your own light up origami balloon using simple circuitry knowledge, some aluminium foil, an LED light and a watch battery. In the instructions it gives a pattern for the circuit which can be printed out and two methods for affixing the foil to the paper, the first using freezer paper and then second using the toner on the print out. I attempted sticking it to the paper using the second method but it didn't work and was a lot easier just using pritt stick. On my first attempt I ripped the foil so the circuit didn't work properly however on the second go it worked a lot better and I managed to get the bulb to light up. In the instructions the circuit seemed to be quite sensitive and seemed to light up quite easily, I found that unless the connection with all the components was secure the light would either not work or flicker so I ended up have to tape it all in place. 
I like how well the light comes through the paper and quite enjoyed making my own circuit out of a few small pieces. It's a shame that to make it work I had to tape everything as it spoils the look of the origami, though for testing out an idea I think it works really well and could possibly also be used for my origami lights. 

Sunday 23 May 2010

Tyvek


Tyvek is material made by DuPont consisting of 100% high density polyethylene (HDPE) making it very tough and durable. The material is made by spinning fine fibres together and then bonding them through heat and pressure. It is very similar to visually appears a lot like paper but is also similar to film and fabric and acts in a similar way to all three, it can be printed onto, is water resistant and can be sewn and made into clothing, there are two kinds depending on the purpose of the application, Tyvek can appear more like a textile or paper.
It is quite often used for arm bands at festivals as it is tear resistant, isn't affected if folded and wont be affected by water or any other kind of liquid. Tyvek is frequently used in the food industry as it can be treated to be used in direct contact with food and is also used for children's toys as it has no chemicals which could be absorbed in placed in a mouth. This also means that if it were disposed of into landfill no chemicals would be leaked into the environment as it is chemically inert and contains no binders.
I wanted to get hold of some to test out how well it would work if used for my origami, after emailing DuPont requesting a sample they sent me some product information about it but haven't sent me any to test out. I also tried a branch of theirs in Swindon though I had no reply. I'd really like to try it out and if I had more time I could request a sample from the Cloth House in London. The Cloth House offer small samples of materials which students or people wouldn't be able to afford if they had to buy a large quantity. I'd like to test sewing it and finding a way to apply it to the origami which would take advantage of all its properties, it could be used in the shower or in ways where it could be folded up small like a bag and taken out when needed. If I requested a sample of the Tyvek it could also be useful in other projects where I needed a durable material or simply decided to print onto it and sew it.

Plaster Origami


After experimenting with the buckram earlier I decided to see how it would hold up when dipped in plaster, these are photos of the sample. I liked the look and feel of the previous sample however I think that by dipping it it has become less disposable and could look more valuable and effective if glazed or lined. I like the solidity of the form and how it has retained the detail in the origami without being spoilt. I'd have liked the plaster to have been absorbed more which might have been possible if I had used more water in the mixture, although the material itself isn't very absorbent and by adding more water it might not be as solid. All the pieces were glued into place before hand to secure them into the right positions and also to stop them from moving when plastered.
A glaze or a lining could give the origami even more value, I'd like to see how the material would look if dipped in porcelain and then fired. If I only dipped the paper origami it would become very fragile as the paper disintegrates, but as the material could absorb more of the porcelain it may not become much weaker even though the fibres would still be burnt away. I think it could make the origami more aesthetically pleasing as the plaster removes some of the delicacy connected with it, however for quick sampling I am pleased with the effect from the plaster.

Saturday 22 May 2010

STUDIO MS


This design duo have a series of products using a concertina type origami, the light pictured above consists of a hard-back book cover with the pages replaced with the origami, by opening and closing the book the brightness of the light can be changed. It then allows for easy storage when not in use as it can then be placed on your bookshelf. The origami technique is the same as VEASYABLE use in their accessories, it's interesting how the same technique can be manipulated into different objects and how simply they have managed to produce two ranges of items which have no similarities in their aesthetics or working ideologies. VEASYABLE are concerned with creating ways which people can find isolation in their surroundings, whereas STUDIO MS produce functional, multi-purpose products. They have found a way to apply the origami technique to tables, books, bags and seating. Their seats are designed to act as a way of bringing people closer by allowing people to move either end around to face each other instead of having to just sit next to each other. I prefer the aesthetics they capture and how, in my opinion, they have created something far more functional in everyday life. 

Buckram Origami


After initially trying out the origami shapes in a soft fabric I decided to try a more rigid one. In these pictures I have used a material called Buckram which is commonly used in bookbinding and for stiffening garments. Buckram is normally made from cotton, though linen is sometimes used as well, and gets its stiffness from being dipped in different hardeners, these substances fill in the gaps between the fibres. Some types of buckram are water resistant as well, normally used for books where they could become susceptible to moisture and mildew and prevents them from becoming so easily worn. As my attempt with the other material hadn't worked very well with the origami pattern I had chosen I decided to try a simpler one where it was made from one square. I found as I was ironing it that it was considerably easier to get crisp folds which would hold in place properly, I still expected to have to sew it to make it stay together but when I came to assemble it I found that they stayed in place as if it were paper, see the bottom picture for my first attempt with the buckram. As this had worked so well without needing any aid to stay in place I decided to try out the pattern I had used earlier with the other fabric to see if a more complicated shape would work, see the top two pictures. Again the material worked really well and the assembly was a lot easier, I used a small amount of glue to simply secure the sides together, though it would have held without. I thought that the lines looked really effective and better represented the origami I had made in paper.
This material is very stiff so if I decided to put in a draw string it wouldn't gather very easily and if it was used very regularly, the folds could weaken and become less prominent. I'd also like to see how this material would react to being dipped in something like plaster, I think it would be able to absorb more of it than paper so could become stiffer and would be less likely to collapse. I think it could look really effective and as more would become trapped between the fibres, less would sit on the surface weakening the strong lines of the origami.

Material Origami


I decided to see what kind of effect I could get from using cloth when folded into origami shapes and found it incredibly difficult to get crisp, straight lines which make the origami look good. As the material is so floppy I first ironed all the lines and when assembling it I then had to use thread to keep them in place, I tried to keep all thread detail hidden on the exterior but I quite like the effect it gives on the interior so if I could sew it neatly enough I don't think it would look out of place. I had planned on inserting a cord through the sides and having the ends exposed so that it could be pulled tight, sealing the opening, however the pattern I decided to use has too many holes and the way I have sewn it the contents could fall through.
I like the feel of the origami in the material though I think a more rigid material would be able to retain the folds better and make sewing it easier. I would also use a different net which wasn't so complicated to assemble. I like the idea of it being used as a change purse, or if made larger it could store bulkier objects. The ability to be crumpled without ruining the shape when opened out makes the cloth an interesting solution to Julia's suggestion of having a customisable origami to fit any shape and size, such as the Beyond Boxes design allows. 

James Dieter


Named the Origami Chair, this prototype is made from polycarbonate and polyester mesh, the layer of polycarbonate gives the structure its strength and is sandwiched between two layers of mesh. The chair is made from a single net which, when assembled, becomes a strong, free standing chair. Due to the semi-transparent properties of the materials used the structure of the chair remains visible. The materials also give the chair angularity and crisp, bold lines. 
The nature of the chair being made up from net could be an interesting alternative to the traditional origami methods I have been using, it would make putting the boxes together easier and require less folding and doubling up on layers. I think the technique could enable me to create shapes easier though I think it would spoil the effect that you get from folding the pieces from same shape squares. The materials he has used for this chair could give my own pieces more of an industrial aesthetic, I would like to look into using materials similar though perhaps on a smaller scale. 
If I were to experiment with making my own origami boxes I would look into using this technique, it would be easier to come up with my own designs, however as I have so far focused mainly on traditional origami I think it would be more in keeping with my project to continue on the same route. 

Wednesday 19 May 2010

VEASYABLE


VEASYBLE is designed to hide and protect people in a society where personal intimacy is constantly invaded. One of the key words behind their work is isolation, their products create an isolation from the ever changing environment we live in whenever we should need it. Their accessories vary in size and position on the body, they're designed to cover the eyes, ears, face and upper body, and unfold over the body with a simple hand movement. The colour of the accessories is also key in the effect of each screen, white exudes a feeling of calm and relaxation which is difficult to find in the multicoloured, bustling world we live in. 
Their products are made from a paper bonded to polyethylene and fabric which gives the accessories strength, durability and flexibility necessary if they were to withstand regular use. This material would be appropriate to my origami pieces if they were to be used as a means of storage, it would give them more rigidity but still be flexible enough to be folded and manipulated. I'd be keen to use a material similar to this to provide my products with a material curiosity, giving them a feel of durability and value. 
The accessories are reminiscent of my initial starting point in this project where I was looking into the idea of a person being able to hide within our society through clothing and the way we project ourselves. I have been interested in the idea of things being hidden away and like the playfulness which VEASYABLE have managed to capture with their products and would hope that I could capture some of this in my finished pieces.

Tuesday 18 May 2010

Food Origami


Above are two examples of origami boxes I have made using rice paper. Rice paper is a thin, edible paper which has little taste and is used in different Asian food, sweets and cake decorating. It can be printed on or coloured so, like when using traditional coloured origami papers, the same combinations of colours could also be achieved. It's incredibly susceptible to liquids so as soon as someone were to put it into their mouth it would dissolve leaving only the taste of the centre. 
Rice paper is also used for the shells of flying saucers which are then filled with sherbet, this has made me look at ways in which to package food and sweets using the rice paper as an edible container. I like how the flying saucers are reminiscent of childhood and have been made for decades and are still in production so my sweets could appeal to people of all ages with a sweet tooth. I'd like to create a box which could possibly contain layers of sweets, so it would start quite large and have a gap in between each layer for a different type of sweet, making the journey of discovering new flavours and textures more exciting and a surprise each time. 
As well as using the rice paper as a container for food, I have also been looking at pastry and making pre-made pastry cases which someone could buy and then fill with their own ingredients. I would have to either use an origami method made from one piece of pastry to prevent the filling for escaping or simply fill in any gaps with excess. The cases could provide a more interesting alternative to the traditional case and make baking more of a talking point when it was being served up. I like the idea of people being able to fill the pastry with whatever they want instead of it being determined for them and so that they could see how the case was made.

Customisable Origami


I began my research into customisable origami boxes by looking at existing patterns and how they could be manipulated to change. The above photo is of a tower box, it currently has two layers but could become taller by adding more layers to it. Because of they way the pieces slot together the box becomes rigid and could support the weight of items in the top layers. With this example I like how the height would be determined by the owner and that they could swap between layers easily, the only problem would be what would to do with the layers you weren't using, would they have to stay in the tower or become something extra to store away till you needed it or forgot it. However this example could look really effective if each level was made from a different material, giving the box an aesthetic and textural variety.
As well as looking at existing boxes I thought about how I could change a simple straight forward box. I want to try out lining some of the stronger boxes with pieces of decorative material which could then be tied around the contents of the box, the tails then going over the edge to be tied over the lid, securing it in place. I think this could work quite effectively with the copper boxes, but I would have to find or create a design with could be stackable as the triangular boxes aren't.

Beyond Boxes


Julia's suggestion of making a customisable form lead me to look at Beyond Boxes. The prototype created by Patrick Sung takes the concept of the traditional corrugated cardboard box and created a cheaper alternative where the box is flat-packed and pre-creased with perpendicular and diagonal lines which means that it can be folded in any direction, into any size and any kind of shape. He takes the cardboard box to the next level, building on its properties and challenging our perceptions of the square box. The folds allow for the contents to be tightly wrapped, minimising on excess packaging for the contents but it still allows for being turned into the classic box.
I considered combining the concept behind the boxes with my origami shapes, though it would have to be extremely simple and obvious in how it would be folded or it could become very confusing. Beyond Boxes works well as it is such a simple idea which is clear and simple to use whereas origami has always been a more complicated art form where there's a very specific way to fold certain shapes. I could move away from the idea of origami to try to create a more customisable form though I particularly like the controlled way origami is folded, so would want to preserve this as much as possible.

Julia Lohmann


Julia Lohmann gave us a lecture about her work and her current projects she's working on and afterwards spoke to us all individually about our work, giving us feedback on where she thought we could expand and develop. She was particularly helpful in giving me ideas on how I could take the origami to the next level in ways which I hadn't considered and gave me a lot of ideas on furthering my work.
During her lecture she showed us images of her work and videos she had made. A lot of her work is concerned with the preservation of natural forms and with challenging peoples boundaries and perceptions between art and revulsion. She has done quite a lot of work around how people treat beef and leather as separate, unrelated by-products to a cow and has made a series of cow benches using a single whole hide of leather to cover a cow shaped form. Another project she did focused on the voids left when a cow is slaughtered and all its organs are removed. She cast molds of it by pouring plaster into it and finally creating a resin and fibreglass form of this void which would otherwise be quickly be lost after the end of the cows life. She has also done projects around preserving sheep stomachs, maggots, sweet teeth, aliens and Japanese fish crates, one I was particularly interested in is a series she is currently working on around kelp and how it can be manipulated. The picture above is of one of her experimental lamps made from kelp where it is wrapped around wooden legs, I like the use of light in the piece and how more of the kelp constructs can be added to dim the light. She is exploring the potential of kelp as a design material and has also turned it into a laminating material, the colours from the kelp range from deep browns to light greens and would provide a cheaper alternative to wood laminates.
When I spoke to Julia about my project she suggested looking into ways I could make it my own, possibly through creating my own origami patterns or by allowing the user to be able to customise the form, either through using drawstrings or different cutting and folding patterns. She also suggested looking at different materials which could add value to the piece but also to think more about what I could package. I'd like the origami to be customisable but from further research I feel that a folding pattern would be too complicated and that the origami would be more valuable if already formed and that materials could play a large part in it.

Copper Origami


The first material testing I did with the origami was to try out a few of the forms in copper sheet. This material is relatively easy to fold though this depended on how many times I tried to fold it, the more times I folded it there became a greater possibility that holes would be made and that I wouldn't get such a crisp line. 
The box in the foreground of the photo above is the first test I did with the copper, this required only one square and meant that there were a lot of initial folds before it was assembled. From this sample I found that I liked the aesthetic of the copper and how it could make the form more interesting, but it wasn't very successful and the metal crumpled too much.
The second box I made, in the background of the photo above, was made up of three squares of copper, each piece was only folded four times in total which meant that it was easier to get an accurate crisp line. The three sides then slot into one another and, as the assembly is so straight forward, they fit together quite accurately.
I particularly like the copper as a material as it makes the origami more durable and appear more valuable. I'd like to see if I could find a way to make the boxes fit together better and also to remove the sharp edges made when cutting the squares. They could also be made to appear more sumptuous by lining them with a plush material such as velvet so that the items inside were being cushioned and protected.

Paper Origami


I started my research into origami by looking at existing patterns for boxes and cubes as these are the classic kinds of containers and I also initially wanted the boxes to be able to fit within each other, like Russian dolls.  Above are a few of the more successful designs I made, they all differ in the amount of squares of paper they were folded from and how they would fit together. These are also the strongest and most rigid box designs I tested so if I made them in a softer material they would be harder to break or squash. 
I am also interested in the way that the boxes are opened, having two halves is the most common way for a box to be opened but I wanted to look at the way it could be made more interesting and interactive for the user. I made a couple of cubes but my favourite was fixed together by slotting the sides into each other, this makes it the least collapsible as each side is supporting another and are folded so many times that they are relatively thick. I'd like to look into a way to make the cube into a usable box so I will need to look into ways to seal the sides and make them stronger.
The aesthetic of the folded cube could be affected if dipped into a hardener like resin as you would no longer be able to feel the texture of the folds, which I feel is a fundamental part to the origami shapes as they always appear as if they could still be unfolded into a flat piece of paper. Porcelain could enhance the feel of the origami though it would then become extremely brittle and too many coats could again spoil the surfaces.
I feel that the best route to continue on with the origami would be to look at different materials, possibly metals or different types of paper, to try to retain and enhance the aesthetic of the origami.

Thursday 6 May 2010

Origami


Origami, the art of paper folding, can be used to create hundreds of different images and shapes and could provide a decorative and interesting solution as a form of packaging. Different materials used can give a unique aesthetic to the form and could make my packaging more visually interesting. I want to look into the various ways that origami can be used to make boxes and a forms that could hold something. The experience could be heightened by making it more like opening a present by using multiple layers, like in Russian dolls or pass-the-parcel.
I also want to look into ways that the paper could be given more strength or even fragility by applying different finishes to it and also what different aesthetics could be achieved through this.

Apple Packaging


After a group crit and from talking through my ideas, I found that they key aspect of my design is based around the idea of packaging and how something could be designed to encase it to prevent movement and give it more protection.
I decided to research more into the notion of packaging and looked at the way that Apple package their products. Over the years they have cut down over 50% of packaging that they used to use for their original iPods and MacBooks, even though the products now may not be any different in size. This means that they're shipping products in a more environmentally friendly way as they can ship more at a time and less materials are being used in the boxes holding them, not to mention that the products themselves are now being produced with fewer toxins, longer lasting batteries and more energy-efficient hardware. Apple aim to put an experience into every part of their product, right down to the packaging and it is designed so flawlessly and neatly that the owner of their new Apple product will quite often keep the box that it came in.
I like the idea of producing a packaging which could become multi-purpose and provide an experience when opening it. When buying an expensive dress or perfume, the item will be wrapped, placed in a quality bag with more decorative pieces added to it. I like the idea of something being made to appear more expensive than it is by the quality of the materials used to package it. I'd also like to produce something which wouldn't be discarded when opened, but rather would be used for another purpose and to create something decorative or which could house something else.